
Abstract
Accurate pipe system fabrication hinges on the precise calculation of pipe fitting dimensions, a cornerstone skill for fitters and fabricators. This article examines the mathematical principles underpinning pipe elbow center calculations. It provides a comprehensive exploration of the formulas required for determining the center-to-end dimensions, commonly known as “takeoff,” for various types of pipe elbows. The investigation covers standard 90-degree long and short radius elbows, angled elbows such as the 45-degree variant, and complex custom-fabricated mitered bends. By breaking down the geometric and trigonometric foundations of these calculations, this document serves as a detailed guide. It presents three proven methods, complete with step-by-step worked examples, to equip professionals with the knowledge to eliminate guesswork, reduce material waste, and ensure the structural and functional integrity of piping installations. The objective is to provide a definitive resource on the pipe elbow center calculation formula for Fitters and Fabricators, enhancing precision and efficiency in the trade.
Key Takeaways
- Master the constant for 90-degree elbows: NPS in inches x 1.5 for long radius.
- Use trigonometry for odd-angle elbows: Tangent(Angle/2) x Radius.
- Calculate mitered bends by understanding the geometry of cut sections.
- Always double-check if you are working with long radius (LR) or short radius (SR) fittings.
- The pipe elbow center calculation formula for Fitters and Fabricators is a non-negotiable skill.
- Differentiate between Nominal Pipe Size (NPS) and the actual outside diameter for accuracy.
- Refer to ASME B16.9 standards for official buttweld fitting dimensions.
Table of Contents
- Understanding the Core Concepts: The Language of Pipe Fittings
- Method 1: The Essential 90-Degree Elbow Calculation
- Method 2: Precision with Angled Elbows (45-Degree and Other Odd Angles)
- Method 3: The Fabricator’s Craft of Mitered Bend Calculation
- Beyond the Basics: Advanced Applications and Considerations
- Frequently Asked Questions (FAQ)
- Conclusion
- References
Understanding the Core Concepts: The Language of Pipe Fittings
Before we can begin to manipulate numbers and apply formulas, we must first establish a shared vocabulary. In the world of pipe fitting and fabrication, precision in language is as vital as precision in measurement. A misunderstanding of a single term can lead to a cascade of errors, resulting in wasted material, lost time, and compromised system integrity. Let us think of this as learning the grammar of a new language; once you understand the structure and the meaning of the words, you can begin to form coherent and meaningful sentences—or in our case, perfectly aligned pipe runs.
The central idea we are pursuing is the “center” of an elbow. Imagine two pipes meeting at a perfect corner. The point where the centerlines of these two pipes would intersect, if they continued straight, is the vertex of our angle. The elbow is the fitting that creates a smooth, curved path between these two pipes. The “pipe elbow center” is the distance from that imaginary intersection point (the vertex) to the face of the fitting on either end. This dimension is also known, perhaps more commonly in the field, as the “takeoff.” When a fitter is calculating the required length of a straight piece of pipe that will connect to an elbow, they subtract the elbow’s takeoff from the total centerline measurement. An error here means the pipe will be too long or too short, a simple mistake with significant consequences.
The Anatomy of a Pipe Elbow
To grasp the pipe elbow center calculation formula for Fitters and Fabricators, one must first be able to identify the key anatomical features of the fitting itself.
- Nominal Pipe Size (NPS): This is the North American standard set of sizes for pipes used for high or low pressures and temperatures. It is important to recognize that for NPS ⅛ to 12, the NPS value is only loosely related to the inside diameter and is not the actual measured dimension. For example, a 4-inch pipe does not have an outside diameter of 4 inches. This is a common point of confusion for apprentices. You must always work with the actual dimensions, which are defined by industry standards.
- Centerline: This is an imaginary line running through the exact middle of a pipe and its associated fittings. All precise piping measurements and layouts are based on these centerlines.
- Radius of the Bend: This is the distance from the center point of the bend’s curve to the centerline of the elbow. The radius determines how sharp or gradual the turn will be. This dimension is the most significant factor in our calculations.
- Face of the Fitting: This is the flat, machined surface at the end of the elbow where it will be welded or threaded to the pipe. Our takeoff measurement is always from the centerline intersection to this face.
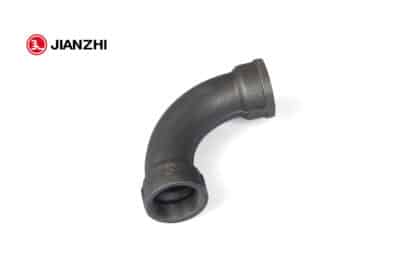
Long Radius (LR) vs. Short Radius (SR) Elbows
Pipe elbows are most commonly manufactured in two standard bend radii: Long Radius (LR) and Short Radius (SR). The choice between them depends on the specific requirements of the piping system, such as pressure, flow rate, and available space. The radius directly impacts the takeoff dimension, so identifying which type you are using is the first step in any calculation.
A Long Radius (LR) elbow provides a more gradual turn. This results in less pressure drop and a smoother flow of the fluid or gas within the pipe. They are the default and most widely used type in general-purpose applications. The rule of thumb for an LR elbow is that its bend radius is 1.5 times the Nominal Pipe Size (NPS).
A Short Radius (SR) elbow has a bend radius equal to the Nominal Pipe Size (NPS). This creates a much sharper, more compact turn. SR elbows are used in tight quarters where space is a primary constraint. However, their sharp turn creates more flow resistance and a higher pressure drop, making them unsuitable for certain applications, particularly those involving the transport of abrasive slurries or high-velocity fluids.
| Feature | Long Radius (LR) Elbow | Short Radius (SR) Elbow |
|---|---|---|
| Bend Radius | 1.5 x Nominal Pipe Size (NPS) | 1.0 x Nominal Pipe Size (NPS) |
| Primary Use | General purpose, smooth flow | Tight spaces, compact layouts |
| Flow Resistance | Lower | Higher |
| Pressure Drop | Lower | Higher |
| Space Requirement | Larger | Smaller |
| Common Example | A 6-inch LR elbow has a 9-inch radius. | A 6-inch SR elbow has a 6-inch radius. |
Understanding this fundamental difference is non-negotiable. Using the calculation for an LR elbow on an SR fitting (or vice-versa) will guarantee an incorrect pipe cut every single time. Many high-quality malleable cast iron parts are available in both configurations to suit diverse project needs.
Method 1: The Essential 90-Degree Elbow Calculation
The 90-degree turn is the most common directional change in any piping system. Whether you are fabricating a simple residential plumbing setup with galvanized pipe fittings or a complex industrial process line, you will encounter the 90-degree elbow more than any other fitting. Consequently, mastering its calculation is the bedrock of a pipefitter’s mathematical toolkit. It is the first formula every apprentice learns, and the one seasoned veterans use daily.
The beauty of the standard 90-degree elbow calculation lies in its simplicity, which stems from the standardized dimensions of the fittings themselves. Manufacturers adhere to strict standards, such as ASME B16.9 for buttweld fittings, which ensures that a 4-inch LR 90 elbow from one reputable manufacturer has the same center-to-face dimension as one from another. This standardization allows us to use simple, reliable constants.
The Magic Number: The 90-Degree Elbow Constant
For a standard 90-degree Long Radius (LR) elbow, the calculation is wonderfully straightforward. The center-to-face dimension is always 1.5 times the Nominal Pipe Size (NPS). This is because the bend radius itself is 1.5 times the NPS, and in a 90-degree elbow, the distance from the vertex to the face along one leg is equal to the bend radius.
Let’s visualize this. Picture the 90-degree angle formed by the intersecting centerlines. The elbow’s curve is a perfect quarter-circle that fits neatly into this corner. The radius of that quarter-circle is the distance from the corner (vertex) to any point on the centerline of the elbow. Since the face of the elbow is where the curve ends, the distance from the vertex to the face is equal to the radius.
Therefore, for any standard LR 90-degree elbow: Takeoff (Center) = 1.5 x NPS
For a standard SR 90-degree elbow, the logic is the same, but the constant changes. The bend radius is equal to the NPS. Takeoff (Center) = 1.0 x NPS (or simply the NPS)
Step-by-Step Example: Calculating a 6-Inch LR 90-Degree Elbow Takeoff
Let’s apply this in a practical scenario. Imagine you have a set of blueprints. They show a straight run of 6-inch pipe that needs to make a 90-degree turn. The overall centerline-to-centerline measurement for this section is 8 feet. Your task is to determine the exact length of the straight pipe you need to cut.
- Identify the Fitting: You are using a 6-inch, Long Radius (LR), 90-degree buttweld elbow.
- Recall the Formula: The formula for an LR 90 is Takeoff = 1.5 x NPS.
- Perform the Calculation:
- NPS = 6 inches
- Takeoff = 1.5 x 6 inches
- Takeoff = 9 inches
The center-to-face dimension of your 6-inch LR 90 elbow is 9 inches.
- Calculate the Pipe Cut Length: The blueprint gives a total centerline-to-centerline length of 8 feet (or 96 inches). This measurement runs from the center of the pipe on one end to the center of the fitting on the other. You need to subtract the takeoff of the elbow to find where your straight pipe ends and the elbow begins.
- Pipe Cut Length = Total Centerline Length – Takeoff
- Pipe Cut Length = 96 inches – 9 inches
- Pipe Cut Length = 87 inches
You will cut a piece of 6-inch pipe that is exactly 87 inches long. When you weld your 9-inch takeoff elbow to it, the total centerline measurement will be the required 96 inches.
What If It’s a Short Radius (SR) Elbow?
Now, let’s imagine the blueprint specified a 6-inch Short Radius (SR) elbow for the same 8-foot section, perhaps due to a space constraint.
- Identify the Fitting: 6-inch, Short Radius (SR), 90-degree elbow.
- Recall the Formula: The formula for an SR 90 is Takeoff = 1.0 x NPS.
- Perform the Calculation:
- NPS = 6 inches
- Takeoff = 1.0 x 6 inches
- Takeoff = 6 inches
The takeoff for the SR elbow is only 6 inches.
- Calculate the Pipe Cut Length:
- Pipe Cut Length = Total Centerline Length – Takeoff
- Pipe Cut Length = 96 inches – 6 inches
- Pipe Cut Length = 90 inches
In this case, you would need a 90-inch piece of pipe. Using the wrong formula would have resulted in a pipe that was 3 inches too short, a costly and unprofessional error. This highlights why the first step is always to correctly identify the fitting’s radius type. This fundamental pipe elbow center calculation formula for Fitters and Fabricators is the starting point for all more complex calculations.
Method 2: Precision with Angled Elbows (45-Degree and Other Odd Angles)
While 90-degree elbows are the most common, piping systems are rarely so simple. They must navigate around equipment, align with nozzles on vessels, and follow the contours of buildings. This requires elbows of various other angles, with 45-degree elbows being the second most common standard fitting. Fabricators may also need to create custom “odd-angle” elbows, such as 30-degree or 60-degree bends.
When the angle is not 90 degrees, the simple constant of 1.5 x NPS no longer applies directly. The relationship between the bend radius and the center-to-face takeoff becomes a matter of trigonometry. Do not be intimidated by this word. For our purposes, we only need to understand one simple trigonometric function: the tangent.
Unveiling the Power of the Tangent Function
Imagine our angled elbow again, sitting at the intersection of two centerlines. If we draw a line from the center of the bend radius to the vertex (the intersection point) and another line from the center of the bend radius to the face of the fitting, we create a right-angled triangle inside the elbow’s geometry.
The takeoff dimension we want to find is one of the sides of this triangle. The other side is the bend radius. The angle inside our triangle is exactly half of the total elbow angle. For a 45-degree elbow, the angle inside our imaginary triangle is 22.5 degrees. For a 60-degree elbow, it’s 30 degrees.
The tangent function in trigonometry describes the relationship between the angle and the lengths of the two shorter sides of a right-angled triangle. Specifically: Tan(Angle) = Length of the Opposite Side / Length of the Adjacent Side
In our elbow’s triangle:
- The “Angle” is half of the elbow’s angle.
- The “Opposite Side” is the takeoff dimension we need to find.
- The “Adjacent Side” is the elbow’s bend radius.
By rearranging this simple formula, we get the universal formula for any angled elbow.
The Universal Formula for Any Elbow Angle
This is the most powerful formula in a pipefitter’s arsenal because it works for any angle, including 90 degrees.
Takeoff (Center) = Tan (Elbow Angle / 2) x Bend Radius
Let’s break this down:
- Tan: This is the tangent function button on any scientific calculator.
- Elbow Angle / 2: You must always divide the total angle of the elbow by two before finding the tangent. This is the most common mistake apprentices make.
- Bend Radius: This is the crucial dimension. For a standard Long Radius (LR) elbow, the radius is 1.5 x NPS. For a Short Radius (SR) elbow, it is 1.0 x NPS.
Step-by-Step Example: Calculating a 10-Inch, 45-Degree LR Elbow
Let’s put the universal formula into practice. You are tasked with making a 45-degree offset in a 10-inch pipe run using a standard LR elbow.
- Identify the Fitting and its Properties:
- Fitting Type: 10-inch, 45-degree Long Radius (LR) elbow.
- NPS = 10 inches.
- Elbow Angle = 45 degrees.
- Determine the Bend Radius: Since it is an LR elbow, the radius is 1.5 x NPS.
- Bend Radius = 1.5 x 10 inches = 15 inches.
- Apply the Universal Formula:
- Takeoff = Tan (Elbow Angle / 2) x Bend Radius
- Takeoff = Tan (45 / 2) x 15
- Takeoff = Tan (22.5) x 15
- Use a Calculator: Now, grab a scientific calculator.
- Enter 22.5.
- Press the TAN button. The result should be approximately 0.4142.
- Multiply this result by the radius (15).
- Takeoff = 0.4142 x 15 inches
- Takeoff = 6.213 inches
For practical field use, this would typically be rounded to the nearest 1/16th of an inch, which is 6 and 3/16 inches. So, the takeoff for your 10-inch, 45-degree LR elbow is 6-3/16″.
Let’s test this formula on a 90-degree elbow to prove its universality. For a 10-inch LR 90:
- Takeoff = Tan (90 / 2) x (1.5 x 10)
- Takeoff = Tan (45) x 15
- The tangent of 45 degrees is exactly 1.
- Takeoff = 1 x 15 = 15 inches. This matches the result from our simple formula in Method 1 (Takeoff = 1.5 x NPS = 1.5 x 10 = 15). The universal formula works every time.
To aid in quick field reference, fitters often use pre-calculated tables for common angles.
| Elbow Angle | Angle / 2 | Tan(Angle / 2) | Takeoff for 1″ Radius |
|---|---|---|---|
| 90° | 45° | 1.0000 | 1.000″ |
| 60° | 30° | 0.5774 | 0.577″ (~9/16″) |
| 45° | 22.5° | 0.4142 | 0.414″ (~7/16″) |
| 30° | 15° | 0.2679 | 0.268″ (~1/4″) |
| 22.5° | 11.25° | 0.1989 | 0.199″ (~3/16″) |
To use this table, you simply find the “Takeoff for 1″ Radius” value for your desired angle and multiply it by the actual radius of your elbow. For our 10-inch LR 45-degree elbow with a 15-inch radius: 0.4142 x 15 = 6.213 inches. It’s a quick way to get the same result.
Method 3: The Fabricator’s Craft of Mitered Bend Calculation
We now move from the world of pre-manufactured fittings to the true craft of the fabricator: creating a custom elbow from straight sections of pipe. This is known as a mitered bend. Mitered bends are often necessary for very large diameter pipes where standard forged elbows are not available or are prohibitively expensive. They are also used to create elbows with very specific, non-standard radii or angles.
A mitered bend is made by cutting two or more sections of pipe at a specific angle and then welding them together. The more sections (or “pieces”) used, the smoother the resulting curve will be. A simple two-piece miter creates a single, sharp 90-degree turn, while a five-piece miter creates a much more gradual, segmented curve.
The calculation for a mitered bend is more involved, as we need to determine not only the takeoff dimensions but also the precise angle at which to cut the pipe. The pipe elbow center calculation formula for Fitters and Fabricators becomes a multi-step process.
The Underlying Geometry of Miter Cuts
Imagine you want to create a 90-degree bend using three pieces of straight pipe. This will require two miter welds. The two end pieces will be cut at an angle on one side, and the middle piece will be cut at the same angle on both sides, creating a trapezoidal shape.
The key values we need to calculate are:
- The Cut Angle (α): The angle at which the pipe must be cut on a band saw or with a torch.
- The Centerline Radius (R): The desired radius of the final bend. This is a design choice.
- The Dimensions of the Pieces: The length of the middle piece(s) and end pieces.
The formula for the cut angle depends on the total angle of the bend and the number of welds. Cut Angle (α) = Total Bend Angle / (2 x Number of Welds)
For our 90-degree, three-piece bend (which has two welds):
- Cut Angle (α) = 90 / (2 x 2) = 90 / 4 = 22.5 degrees.
- This is the angle you will set on your cutting equipment.
Calculating the Piece Lengths
Once you have the cut angle, you can calculate the required lengths of the pieces to achieve a specific centerline radius.
- Length of Middle Piece(s) (L):L = 2 x R x Tan(α) Where R is the desired centerline radius and α is the cut angle we just found.
- Length of End Pieces (H): The end pieces are half the length of the middle pieces. H = R x Tan(α)
A Fabricator’s Walkthrough: Creating a 4-Piece, 90-Degree Miter Bend
Let’s walk through a more complex example. A client needs a 90-degree bend for a 20-inch diameter pipe. A standard forged elbow is not readily available, so you decide to fabricate a 4-piece mitered bend. The client has specified a long centerline radius of 48 inches to ensure smooth flow.
- Define the Parameters:
- Pipe Diameter: 20 inches
- Total Bend Angle: 90 degrees
- Number of Pieces: 4 (This means there will be 3 welds)
- Desired Centerline Radius (R): 48 inches
- Calculate the Cut Angle (α):
- Cut Angle (α) = Total Bend Angle / (2 x Number of Welds)
- Cut Angle (α) = 90 / (2 x 3) = 90 / 6 = 15 degrees.
- You will need to make cuts at a 15-degree angle.
- Calculate the Length of the Middle Pieces (L): Our 4-piece bend will have two identical middle pieces.
- L = 2 x R x Tan(α)
- L = 2 x 48 x Tan(15)
- L = 96 x 0.2679
- L = 25.72 inches (approximately 25 and 11/16 inches)
- This is the centerline length of the two middle sections.
- Calculate the Length of the End Pieces (H): Our bend will have two end pieces.
- H = R x Tan(α)
- H = 48 x Tan(15)
- H = 48 x 0.2679
- H = 12.86 inches (approximately 12 and 7/8 inches)
- This is the centerline length of the two end sections.
- Layout and Fabrication:
- You will take two lengths of 20-inch pipe.
- From one, you will cut the two middle pieces. You will need to carefully lay out the 15-degree angle cuts to ensure the centerline length of each piece is 25-11/16″. The pieces will be trapezoidal.
- From the other pipe, you will cut the two end pieces, each with a centerline length of 12-7/8″ and a 15-degree cut on one side.
- When these four pieces are carefully welded together, they will form a smooth, segmented 90-degree bend with a 48-inch centerline radius.
This method requires a high degree of skill in layout, cutting, and welding. A deep understanding of the underlying formula for calculating the size of elbow and its trigonometric basis is essential for success.
Beyond the Basics: Advanced Applications and Considerations
Having mastered the three fundamental methods for calculating elbow centers, we can now explore more complex scenarios and the nuanced considerations that separate an adequate fitter from an exceptional one. The world of piping is not always straight lines and simple angles. Often, pipes must change direction in multiple planes simultaneously, a situation that requires a firm grasp of three-dimensional trigonometry.
The Challenge of the Rolling Offset
A rolling offset occurs when a pipe needs to move horizontally and vertically at the same time. Imagine a pipe running along a wall that needs to jog over a few inches and up a few inches to avoid an obstruction before continuing in its original direction. This requires two angled elbows (typically 45-degree) oriented in a compound angle.
Calculating the true length of the pipe between these two elbows (the “travel” piece) is a classic pipefitter’s challenge that builds directly upon our knowledge of elbow takeoffs.
- Understanding the Geometry: The rolling offset forms a right-angled triangle in three-dimensional space.
- The “Rise” is the vertical change in elevation.
- The “Roll” is the horizontal change.
- The “Travel” is the hypotenuse of this 3D triangle, representing the true centerline length of the diagonal pipe.
- The Calculation:
- First, calculate the “True Offset” using the Pythagorean theorem: True Offset = √(Rise² + Roll²)
- Then, calculate the “Travel” length. If using 45-degree elbows, the travel is the True Offset multiplied by 1.414 (the cosecant of 45 degrees). Travel = True Offset x 1.414.
- Finally, you must subtract the takeoff of both 45-degree elbows from the calculated Travel length to find your actual pipe cut length.
Let’s say you have a 4-inch pipe with a rolling offset that has a rise of 12 inches and a roll of 16 inches, using LR 45-degree elbows.
- Elbow Takeoff: From Method 2, the takeoff for a 4″ LR 45° elbow is Tan(22.5) x (1.5 x 4) = 0.4142 x 6 = 2.485 inches (approx. 2-1/2″).
- True Offset: √(12² + 16²) = √(144 + 256) = √400 = 20 inches.
- Travel: 20 inches x 1.414 = 28.28 inches (approx. 28-1/4″).
- Pipe Cut Length: 28.28 – (2 x 2.485) = 28.28 – 4.97 = 23.31 inches (approx. 23-5/16″).
This demonstrates how the fundamental pipe elbow center calculation formula for Fitters and Fabricators is a building block for solving more complex, real-world problems.
Material and Manufacturing Considerations
While the mathematics remains constant, the physical characteristics of the fittings can introduce variables. High-quality manufacturers, such as those producing a wide range of black pipe fittings, adhere to strict dimensional tolerances as specified by bodies like the American Society of Mechanical Engineers (ASME) and the American National Standards Institute (ANSI).
However, it is always wise to spot-check the actual dimensions of a fitting, especially when working with non-standard or custom-fabricated components. A slight variation in the manufacturing process could lead to a small discrepancy in the takeoff. For critical applications, measuring a sample fitting from a new batch is a good quality control practice.
Furthermore, the method of joining—be it buttwelding, socket welding, or threading—can affect the final installed length. For threaded fittings, the engagement length (how far the pipe screws into the fitting) must be accounted for. For socket weld fittings, the small gap required at the bottom of the socket before welding must be considered in precise layouts. While our centerline calculations remain the same, these factors affect the final “face-to-face” and “end-to-end” dimensions of a fabricated spool.
Frequently Asked Questions (FAQ)
What is the difference between an elbow’s “center” and its “takeoff”? In practice, the terms “center” and “takeoff” are often used interchangeably. Both refer to the same critical dimension: the distance from the intersection of the pipe centerlines to the face of the elbow. This is the value you subtract from your overall centerline measurement to determine the cut length of the connecting pipe.
Can I use the same formula for threaded elbows and buttweld elbows? Yes, the centerline geometry is the same. The pipe elbow center calculation formula for Fitters and Fabricators applies to both. However, for threaded fittings, you must also account for thread engagement when calculating the final physical length of your pipe nipple. The takeoff calculation gives you the centerline length, but the actual pipe cut will be slightly different to accommodate the threads.
How do I find the radius of an unknown or non-standard elbow? If you have a fitting that is not a standard LR or SR elbow, you can measure its radius directly. Place the elbow on a flat surface. Use two straightedges to extend the lines from the faces of the fitting until they intersect. This intersection is the vertex. The distance from this vertex to the center of the elbow’s face is the takeoff. You can also place a square in the “throat” (the inside curve) of the elbow. The point where the corner of the square touches the throat and the two sides of the square touch the faces of the elbow will allow you to measure back to find the center point of the radius.
Why do I have to divide the elbow angle by two in the universal formula? The formula Takeoff = Tan (Elbow Angle / 2) x Bend Radius is derived from the right-angled triangle formed inside the elbow’s geometry. This imaginary triangle only occupies half of the total elbow structure. Therefore, the angle within that specific triangle is half of the total bend angle of the elbow. Using the full angle is a common error that will produce a wildly incorrect result.
Are there apps or digital tools that can do these calculations? Yes, numerous pipefitter calculator apps are available for smartphones and tablets. They are excellent tools for quickly verifying calculations or for solving complex rolling offsets. However, every professional fitter and fabricator should be able to perform these calculations manually. Relying solely on an app without understanding the underlying principles can be a significant handicap when you need to solve a problem on-site without a digital aid or when you need to verify that an app’s output makes logical sense. Understanding the formula is fundamental to the craft.
Conclusion
The ability to accurately calculate the center of a pipe elbow is not merely an academic exercise; it is a fundamental and indispensable skill that lies at the heart of the pipefitting and fabrication trade. It is the mathematical language that translates a two-dimensional blueprint into a three-dimensional, functional, and safe piping system. From the simple constant used for a 90-degree elbow to the trigonometric precision required for angled and mitered bends, each calculation is a step toward professionalism and mastery.
By internalizing these three proven methods, a tradesperson moves beyond guesswork and into the realm of certainty. This knowledge empowers them to reduce material waste, avoid costly rework, and ensure that every joint aligns perfectly. The pipe elbow center calculation formula for Fitters and Fabricators is more than just a set of equations; it is a testament to the blend of intellectual rigor and hands-on skill that defines the craft. Embracing these principles ensures that the work performed is not only accurate but also a source of professional pride.
References
Hebei Jianzhi Casting Group Co., Ltd. (2025). Malleable iron pipe fittings. Jianzhi.
Hebei Jianzhi Casting Group Co., Ltd. (2025). Durable malleable iron fittings with standard thread pitch pipe fitting malleable iron coupling fittings. Made-in-China.
Jianzhi Pipe Fittings. (2025). Galvanised/black steel pipe and fittings wholesale | Cast iron pipe fitting. https://www.malleableiron-pipefitting.com/products/
Jianzhi Pipe Fittings. (2025). China malleable cast iron pipe fittings & malleable iron pipe fittings manufacturers. https://www.jianzhipipefitting.com/
Jianzhi Pipe Fittings. (2022). Ductile iron pipe fittings rubber ring installation. Jianzhi-Fitting.net. https://www.jianzhi-fitting.net/news/ductile-iron-pipe-fittings-rubber-ring-install-72012195.html
Jianzhi Pipe Fittings. (2021). Jianzhi brand story, malleable steel pipe fittings factory. Malleableiron-pipefitting.com.