
Abstract
Calculating the center-to-end dimension, often called the “take-off,” of a 45-degree elbow is a fundamental requirement for accurate pipe system fabrication and installation. This measurement represents the distance from the center point of the elbow’s arc to the face of one of its connecting ends. An incorrect calculation leads to errors in pipe cutting, resulting in misalignment, material waste, and increased labor costs. This document explores the underlying geometric principles governing this calculation, presenting three distinct and practical methods for determining this critical dimension. It examines the mathematical formula derived from trigonometry, the use of standardized multipliers for rapid estimation, and the application of manufacturer-specific dimension charts for the highest degree of precision, particularly for components like malleable cast iron fittings. The analysis extends to considerations for both long and short radius elbows and the practical necessity of accounting for thread engagement, or “fitting makeup,” in threaded systems to ensure precise cut lengths for connecting pipes.
Key Takeaways
- The elbow center is the distance from the intersection of the centerlines to the fitting’s face.
- Use the formula: Take-off = tan(22.5°) × Radius for a precise geometric calculation.
- A common multiplier for a 45-degree elbow is 0.4142, multiplied by the nominal pipe size.
- Always consult the manufacturer’s data sheet for the most accurate dimensions.
- Knowing how much is the center of a 45 degree elbow is crucial for accurate pipe cutting.
- Subtract fitting makeup (thread engagement) from the take-off for the final pipe cut length.
- Short radius and long radius elbows have different center-to-end dimensions.
Table of Contents
- Understanding the “Center” of a 45-Degree Elbow
- Method 1: The Fundamental Trigonometry Formula
- Method 2: Using Standardized Calculation Multipliers
- Method 3: The Definitive Manufacturer’s Data Chart
- Comparing Calculation Methods: Precision vs. Speed
- Critical Adjustments: Factoring in Pipe Fitting Makeup
- Long Radius vs. Short Radius: How Geometry Changes the Center
- Practical Application: Calculating a Rolling Offset
- Frequently Asked Questions (FAQ)
- Final Thoughts on Precision
- References
Understanding the “Center” of a 45-Degree Elbow
Before we can answer the question, “How much is the center of a 45 degree elbow?”, we must first establish a shared understanding of what this “center” truly represents. In the world of piping, this term can feel a bit abstract. You can’t exactly point to a physical spot on the fitting and call it the center. Instead, it is a theoretical point, an intersection of ghosts. Imagine two pipes connected by the elbow, each extending infinitely along its central axis. The point where these two centerlines would cross is the “center” of the elbow.
From this theoretical intersection, we measure out to the face of the fitting where the pipe begins to connect. This distance is what pipefitters, engineers, and designers call the “center-to-end” dimension, or more colloquially, the “take-off.” Why does this matter so much? Because when you are laying out a pipe run, you are working with centerline measurements. To determine the actual length of pipe you need to cut—the “cut piece”—you must subtract the take-off of the fittings at each end from the overall centerline measurement. A small error in this calculation can cascade into a significant problem, especially over long, complex runs. It is the bridge between the blueprint’s design and the tangible reality of a perfectly fitted system. This dimension is not arbitrary; it is dictated by the geometry of the bend and the standards to which the fitting is manufactured.
The Anatomy of an Elbow’s Dimensions
Let’s visualize the 45-degree elbow. It is a segment of a larger circle’s arc. The key components influencing its take-off dimension are:
- Degree of Turn: In this case, 45 degrees. This is the angle by which the direction of flow is changed.
- Nominal Pipe Size (NPS): This is a North American set of standard sizes for pipes used for high or low pressures and temperatures. It refers to the pipe’s inside diameter only in a general way; for instance, a 2-inch NPS pipe does not necessarily have an inside diameter of exactly 2 inches.
- Bend Radius: This is the distance from the elbow’s center point to the centerline of the pipe arc. Elbows are commonly available in “Long Radius” (LR) and “Short Radius” (SR) versions, which have different center-to-end dimensions. A long radius elbow typically has a bend radius equal to 1.5 times the NPS, while a short radius elbow’s radius is equal to the NPS.
Understanding these components is the first step toward mastering the calculations that ensure your pipe pieces fit correctly on the first try.
Method 1: The Fundamental Trigonometry Formula
At its heart, the problem of finding the elbow center is a problem of geometry. For those who wish to understand the “why” behind the numbers, the trigonometric approach is the most illuminating. It reveals the elegant relationship between the elbow’s angle and its physical dimensions.
Understanding the Geometry
If you draw lines from the center point of the elbow’s arc to each face, and then draw the centerlines of the pipes, you create a right-angled triangle. This is the key to the whole calculation.
- The two equal sides of the triangle (the adjacent and opposite sides) are the center-to-end dimensions we want to find.
- The angle of the elbow (45 degrees) is bisected by the triangle’s hypotenuse. This means the angle inside our right-angled triangle is half of the total elbow angle, which is 45 / 2 = 22.5 degrees.
- The “Radius” in this context is the distance from the theoretical center point to the centerline of the elbow’s curve.
The relationship between the angle and the sides of a right-angled triangle is defined by tangent (tan). The tangent of an angle is the ratio of the length of the opposite side to the length of the adjacent side. In our specific case, the formula becomes:
Take-off = tan(Angle / 2) × Bend Radius
For our 45-degree elbow, this simplifies to:
Take-off = tan(22.5°) × Bend Radius
Step-by-Step Calculation Example
Let’s apply this to a real-world scenario. Imagine we are working with a 4-inch Nominal Pipe Size (NPS) Long Radius (LR) 45-degree elbow.
- Determine the Bend Radius: For a standard long radius elbow, the bend radius is 1.5 times the NPS. However, for 45-degree elbows, a more common standard is to use the same center-to-end dimension as a 90-degree LR elbow, which we will use in the next method. For the sake of this formula, let’s assume a known bend radius to illustrate the concept. If we were to use a radius equal to that of a 90-degree LR elbow (which is 1.5 x NPS), the radius would be 1.5 x 4 inches = 6 inches.
- Find the Tangent: We need the tangent of 22.5 degrees. Using a scientific calculator, tan(22.5°) ≈ 0.4142.
- Calculate the Take-off: Now, we multiply the tangent by the radius. Take-off = 0.4142 × 6 inches = 2.4852 inches.
This method is powerful because it works for any angle of elbow, not just 45 degrees. If you had a 60-degree elbow, you would use tan(30°). It gives you a direct, foundational understanding of where the dimension comes from. However, it requires knowing the bend radius, which itself can sometimes be an assumed standard rather than a fixed rule, leading us to our next, more direct method.
Method 2: Using Standardized Calculation Multipliers
While the trigonometric formula is excellent for understanding the theory, in the field, speed and simplicity are often paramount. This is where standardized multipliers come into play. A multiplier is a pre-calculated constant that you can multiply by the Nominal Pipe Size (NPS) to quickly find the take-off for a standard fitting.
The Logic Behind Multipliers
The multiplier is essentially the tangent value we just used. Since tan(22.5°) is always 0.4142, and the bend radius for standard elbows is a consistent multiple of the NPS, these values can be combined into a single, simple constant for each elbow angle. This removes the need for a scientific calculator and reduces the chance of manual error.
For a standard 45-degree butt-weld elbow, the most commonly used multiplier is 0.4142.
The formula is beautifully simple:
Take-off = Nominal Pipe Size (NPS) × Multiplier
Standard Multipliers for Pipe Fittings
For quick reference, it is helpful to have a table of common multipliers. These are invaluable for anyone working with pipe.
| Elbow Angle | Multiplier (Constant) | Calculation Example (for 2″ NPS) |
|---|---|---|
| 90° (Long Radius) | 1.5000 | 2″ × 1.5 = 3.00″ |
| 90° (Short Radius) | 1.0000 | 2″ × 1.0 = 2.00″ |
| 45° | 0.4142 | 2″ × 0.4142 = 0.8284″ |
| 22.5° | 0.1989 | 2″ × 0.1989 = 0.3978″ |
Note: These multipliers are most accurate for butt-weld fittings. Threaded fittings like the malleable cast iron fittings often have dimensions that do not perfectly follow these rules, which is why the next method is so important.
Applying the Multiplier: A Quick Example
Let’s use the multiplier method for a 3-inch NPS 45-degree elbow.
- Identify the NPS: The NPS is 3 inches.
- Find the Multiplier: From our table, the multiplier for a 45-degree elbow is 0.4142.
- Calculate the Take-off: Take-off = 3 inches × 0.4142 = 1.2426 inches.
You can see how much faster this is. With a simple multiplication, you have a reliable take-off measurement for your calculations. This method is the workhorse for many pipefitters for estimating and on-the-fly calculations.
Method 3: The Definitive Manufacturer’s Data Chart
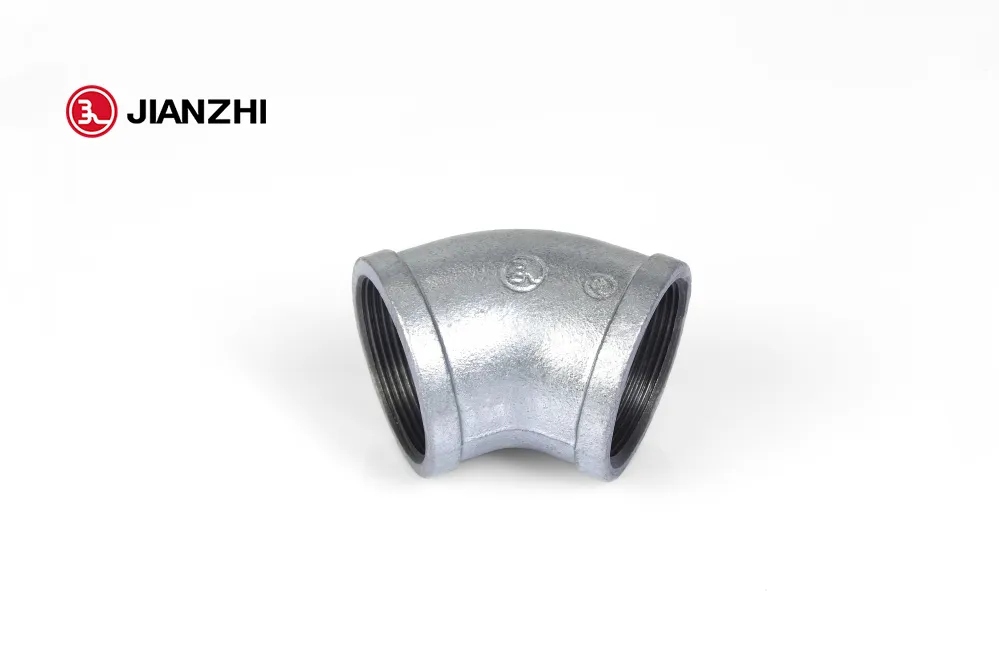
The first two methods are excellent and will get you very close, but they operate on a level of standardization and theory. The physical world, however, is a place of manufacturing tolerances and specific design choices. A 2-inch 45-degree elbow from one manufacturer may have a slightly different center-to-end dimension than one from another. This is especially true for threaded and socket-weld fittings, such as those made from malleable iron or cast steel.
Why Charts are the Gold Standard
Manufacturers like Jianzhi Pipe Fittings provide detailed specification sheets for their products. These charts are not based on theory; they are the “as-built” dimensions of the actual fittings. Using these charts is the only way to guarantee 100% accuracy in your take-off calculations. For projects requiring high precision, such as in industrial processing plants, medical gas lines, or complex HVAC systems, relying on manufacturer data is non-negotiable.
These charts remove all guesswork. They account for the specific manufacturing process, whether it’s casting for malleable iron fittings or forging for steel fittings, and the specific radius used in their tooling.
How to Read a Fitting Dimension Chart
At first glance, a data sheet can seem dense with numbers. But finding the take-off is usually straightforward. You will look for a table that lists dimensions based on the Nominal Pipe Size (NPS).
Here is a simplified example of what a manufacturer’s chart for a 45-degree threaded malleable iron elbow might look like:
| NPS (in) | Part Number | Center-to-End (A) (in) | Approx. Weight (lbs) |
|---|---|---|---|
| 1/2 | JZ-45-050 | 0.88 | 0.25 |
| 3/4 | JZ-45-075 | 1.06 | 0.40 |
| 1 | JZ-45-100 | 1.25 | 0.60 |
| 1 1/4 | JZ-45-125 | 1.50 | 0.95 |
| 1 1/2 | JZ-45-150 | 1.69 | 1.25 |
| 2 | JZ-45-200 | 1.94 | 1.90 |
In this table, the column labeled “Center-to-End (A)” gives you the exact take-off dimension you need. There is no calculation required, only the ability to look up the correct value for your pipe size. Notice how the 2-inch fitting has a take-off of 1.94 inches. The multiplier method would have given us 0.8284 inches, a significant difference highlighting the importance of using manufacturer data for non-butt-weld fittings. The multiplier method is primarily for pipe, not fittings, and this is a common point of confusion. For fittings, the manufacturer’s chart is the only reliable source.
Comparing Calculation Methods: Precision vs. Speed
Each of the three methods has its place, and the choice depends on the application, the type of fitting, and the required level of precision.
- Trigonometry Formula: Best for understanding the theory and for calculating take-offs for non-standard custom-bent pipes or when a manufacturer’s chart is unavailable. It is high in precision but slower to use.
- Multiplier Method: Excellent for quick estimations and for standard butt-weld elbows where standards are very consistent. It offers great speed but can be inaccurate for threaded or socket-weld fittings.
- Manufacturer’s Chart: The gold standard for accuracy. It is the most reliable method for all fitting types, especially for specialized products like galvanized or black malleable iron fittings. It is fast and eliminates calculation errors, but requires access to the specific data sheet. A good general Elbow center calculation formula can provide a baseline, but the manufacturer’s chart provides the final word.
Critical Adjustments: Factoring in Pipe Fitting Makeup
We have successfully determined the center-to-end dimension, or take-off. But there is one more crucial step before you can cut your pipe, at least for threaded systems. This step is accounting for “fitting makeup” or “thread engagement.”
When you screw a threaded pipe into a fitting like a malleable iron elbow, the pipe does not butt up against a hard stop inside. It threads in until it is tight, and a certain length of the pipe’s thread disappears into the fitting. This length is the makeup.
To get the true “cut length” of your pipe, you must first calculate the center-to-center distance of your pipe run, subtract the take-off for the fittings on both ends, and then add back the makeup for both fittings.
A more intuitive way to think about it is this:
- Find the “end-to-end” of the assembled pipe run. This is the center-to-center distance minus the take-offs.
- Find the “gap” inside the fitting. This is the distance from the face of the fitting to where the pipe will actually stop. This is the makeup.
- Your final cut length is the “end-to-end” distance minus the two gaps.
A common way to simplify this is: Cut Length = Center-to-Center – (Take-off 1 + Take-off 2) + (Makeup 1 + Makeup 2)
The amount of makeup varies by pipe size. It is a standardized dimension that experienced pipefitters often memorize. For NPT (National Pipe Taper) threads, common in the USA, the makeup for a 2-inch pipe is approximately 5/8 of an inch. Failing to account for this will result in a pipe that is too short every single time.
Long Radius vs. Short Radius: How Geometry Changes the Center
The terms “Long Radius” (LR) and “Short Radius” (SR) are most common with 90-degree elbows, but the principle applies to all angles. The radius of the bend directly impacts the center-to-end dimension.
- Long Radius (LR) Elbow: Generally has a bend radius of 1.5 times the NPS. This creates a gentler, sweeping turn. The flow of fluid through an LR elbow is smoother, resulting in less pressure drop and less turbulence. They are the standard choice for most applications.
- Short Radius (SR) Elbow: Generally has a bend radius equal to the NPS. This is a much tighter, more abrupt turn. SR elbows are used in tight spaces where an LR elbow would not fit. However, the sharp turn increases friction, pressure drop, and the potential for erosion, especially with abrasive fluids.
Because the bend radius is a key variable in the trigonometric formula, it’s clear that an LR 45-degree elbow will have a larger center-to-end dimension than an SR 45-degree elbow of the same pipe size. When using multipliers or charts, you must be certain you are looking at the value for the correct radius type (LR or SR).
Practical Application: Calculating a Rolling Offset
Now let’s put it all together in a common, slightly more complex scenario: the rolling offset. A rolling offset is when a pipe needs to change direction both horizontally and vertically at the same time. This maneuver almost always uses two 45-degree elbows.
Imagine a pipe needs to move 12 inches to the right (the “offset”) and 12 inches up (the “rise”).
- Calculate the Travel Piece: The “travel” is the length of the diagonal pipe connecting the two 45-degree elbows. We can find this using the Pythagorean theorem. First, we find the diagonal of the base (the “run”): Run = √(Offset² + Rise²) = √(12² + 12²) = √288 ≈ 16.97 inches. The travel piece is then found using a constant for 45-degree offsets: Travel = Run × 1.414 = 16.97 × 1.414 ≈ 24 inches.
- Determine the Take-off: Let’s say we are using 2-inch 45-degree elbows. We consult our manufacturer’s chart and find the take-off is 1.94 inches for each elbow.
- Calculate the Cut Length: The cut length of the travel piece is the total travel distance minus the take-off for both elbows. Cut Length = Travel – (Take-off 1 + Take-off 2) Cut Length = 24 inches – (1.94 inches + 1.94 inches) Cut Length = 24 inches – 3.88 inches = 20.12 inches, or approximately 20 1/8 inches.
If these were threaded fittings, we would also need to add back the makeup for the two threads before making our final cut. This example demonstrates how the simple act of finding the center of a 45-degree elbow is a fundamental building block for solving much more complex piping layouts.
Frequently Asked Questions (FAQ)
What is the simple take-off for a 45-degree elbow?
For a quick estimation on standard butt-weld pipe, you can multiply the nominal pipe size by 0.4142. For a 1-inch pipe, this would be 0.4142 inches. However, for threaded fittings, always refer to the manufacturer’s chart, as the value is different.
How do you calculate the travel piece between two 45-degree elbows?
First, determine the “run” (the true diagonal distance of the offset). If the offset has a horizontal roll and a vertical rise, the run is √(Roll² + Rise²). The travel piece is then the run multiplied by the constant 1.414.
Is the center calculation different for butt-weld vs. threaded elbows?
Yes, significantly. Butt-weld elbow dimensions often follow standard multiplier rules more closely. Threaded malleable iron or cast fittings have dimensions determined by the casting and threading process. Their center-to-end dimensions are unique and must be taken from a manufacturer’s data sheet.
What does “NPS” stand for and how does it relate to the actual pipe size?
NPS stands for Nominal Pipe Size. It is a North American standard for designating pipe sizes. For NPS 1/8 to 12, the NPS is loosely related to the inside diameter. For NPS 14 and larger, the NPS is equal to the outside diameter of the pipe in inches. It is a nominal designation, not a precise measurement.
How do you calculate a 45-degree offset with pipe?
To calculate the length of the diagonal pipe (the “travel”) in a 45-degree offset, measure the center-to-center distance of the offset and multiply it by 1.414. From this travel length, you must subtract the take-off of the two 45-degree elbows to find your final cut length.
Why is a long radius elbow preferred over a short radius elbow?
A long radius elbow provides a smoother flow path for the fluid. This reduces frictional losses, lowers the pressure drop across the fitting, and minimizes turbulence and potential pipe wall erosion. Short radius elbows are typically only used in tight spaces where a long radius elbow will not fit.
Does the material of the elbow (e.g., steel, malleable iron, PVC) change the center dimension?
Yes, the material and manufacturing process can affect the final dimensions. While fittings are made to conform to standards like ASME B16.3 for malleable iron threaded fittings, there can be slight variations. A PVC socket-weld elbow will have a different center-to-end dimension than a threaded iron elbow of the same size. Always use data specific to the fitting you are using.
Final Thoughts on Precision
The seemingly simple question of “how much is the center of a 45 degree elbow” opens a door into the precision, geometry, and practical knowledge that defines the craft of pipefitting. While quick multipliers and formulas have their place, the ultimate source of truth lies with the manufacturer. In an industry where millimeters can mean the difference between a perfect fit and a costly rework, embracing the data provided by the creators of these essential components is not just good practice—it is the hallmark of a true professional. The ability to move fluidly between a theoretical formula, a quick field calculation, and a definitive data chart is what elevates the craft from simple assembly to an applied science.
References
Jianzhi. (2023). Malleable cast iron pipe fittings – The durable and versatile solution for plumbing systems. Jianzhi Pipe Fitting. https://www.jianzhipipefitting.com/2023/07/12/malleable-cast-iron-pipe-fittings-the-durable-and-versatile-solution-for-plumbing-systems/
Jianzhi. (2022). What are malleable cast iron threaded pipe fittings? Jianzhi Pipe Fitting. https://www.jianzhipipefitting.com/2022/09/13/what-are-malleable-cast-iron-threaded-pipe-fittings/
Jianzhi. (n.d.). Malleable cast iron pipe fittings: Reliable, high-strength pipe connectors. Made-in-China.com.
Jianzhi. (2023). The benefits of malleable cast iron pipe fittings. Jianzhi Pipe Fitting. https://www.jianzhipipefitting.com/2023/06/27/the-benefits-of-malleable-cast-iron-pipe-fittings/
Jianzhi. (2023). Using malleable cast iron pipe fittings for plumbing. Jianzhi Pipe Fitting. https://www.jianzhipipefitting.com/2023/06/08/using-malleable-cast-iron-pipe-fittings-for-plumbing/
Jianzhi. (n.d.). Jianzhi GI nipple decorative flange metal fittings. Made-in-China.com.
Jianzhi. (n.d.). Malleable iron fittings manufacturer. Jianzhi Pipe Fitting. https://www.jianzhipipefitting.com/